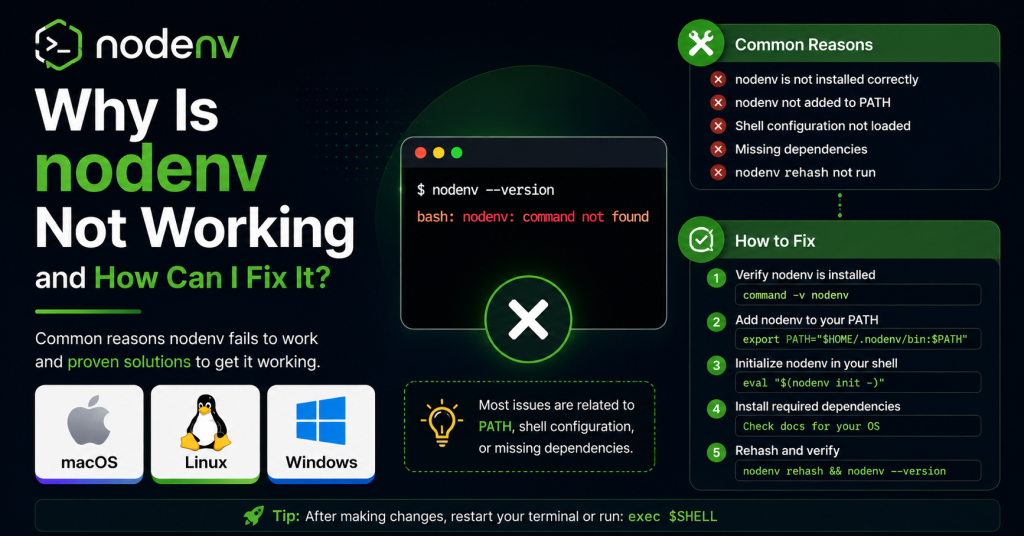
If you’re using nodenv to manage multiple Node.js versions, it can be frustrating when it suddenly stops working as expected. You might encounter errors such as “nodenv: command not found,” notice that the wrong Node.js version is being used, or find that installed packages are no longer accessible. These issues are common and are usually caused by incorrect installation, PATH configuration problems, missing shims, or conflicts with other Node.js version managers.
Fortunately, most nodenv problems can be fixed quickly with a few troubleshooting steps. In this guide, you’ll learn why nodenv is not working, explore the most common causes behind these errors, and discover practical, step-by-step solutions to get nodenv running smoothly so you can continue managing your Node.js development environment with confidence.
Read More: How Do I Set a Global and Local Node.js Version with nodenv?
Common Reasons Why nodenv Stops Working
Most nodenv problems happen because of one of these reasons:
- nodenv isn’t installed correctly.
- The PATH environment variable isn’t configured.
- Shell initialization files haven’t been updated.
- Shims haven’t been rebuilt.
- The required Node.js version isn’t installed.
- Another Node.js version manager is causing conflicts.
- The terminal hasn’t been restarted after installation.
Let’s look at each problem in detail.
Problem 1: “nodenv: command not found”
This is one of the most common errors.
Why It Happens
Your system cannot find the nodenv executable because it isn’t installed or its directory isn’t included in your PATH.
How to Fix It
First, verify whether nodenv exists.
which nodenvor
command -v nodenvIf nothing is returned, nodenv isn’t available in your PATH.
If you’re using Homebrew on macOS:
brew install nodenvOn Linux, install nodenv according to your package manager or clone it from GitHub.
After installation, restart your terminal and verify:
nodenv --versionProblem 2: PATH Is Not Configured Correctly
Even if nodenv is installed, your shell may not know where to find it.
Check Your PATH
Run:
echo $PATHThe nodenv shims directory should appear before system Node.js paths.
Typical configuration looks like this:
export PATH="$HOME/.nodenv/bin:$PATH"
eval "$(nodenv init -)"
Add these lines to your shell configuration file:
.bashrc.bash_profile.zshrc
depending on your shell.
Reload the configuration:
source ~/.zshrcor
source ~/.bashrcProblem 3: nodenv Is Installed but Uses the Wrong Node.js Version
Sometimes nodenv appears to work, but Node.js doesn’t change.
Check which version is currently active:
node -vNow check nodenv’s selected version:
nodenv versionIf these versions don’t match, your shell isn’t using nodenv’s shims.
Verify the executable:
which nodeIt should point to something similar to:
~/.nodenv/shims/nodeIf it points to /usr/bin/node or another location, your PATH order is incorrect.
Problem 4: Node Version Is Not Installed
You may receive an error like:
nodenv: version '20.0.0' not installedCheck installed versions:
nodenv versionsIf the required version isn’t listed, install it.
If you have node-build installed:
nodenv install 20.0.0Then make it active:
nodenv global 20.0.0Confirm:
node -vProblem 5: Forgetting to Run nodenv rehash
Whenever you install a new Node.js version or global npm package, nodenv needs to rebuild its shims.
Run:
nodenv rehashThen test again:
node -v
npm -v
This command solves many unexpected command-not-found issues.
Problem 6: npm Global Packages Are Missing
After switching Node.js versions, you might notice that globally installed packages disappear.
For example:
eslintor
typescriptmay no longer work.
This happens because each Node.js version has its own global package directory.
Simply reinstall the packages:
npm install -g typescriptor
npm install -g eslintThen rebuild shims:
nodenv rehashProblem 7: Another Version Manager Is Interfering
Using multiple Node.js version managers at the same time often creates conflicts.
Examples include:
- NVM
- Volta
- fnm
- asdf
Check where Node.js is coming from:
which nodeIf it doesn’t point to nodenv’s shims, another version manager is taking priority.
Disable the conflicting manager or remove its initialization from your shell configuration.
Restart the terminal afterward.
Problem 8: Local Version Isn’t Being Used
A project may contain a local Node.js version.
Check:
nodenv localor
cat .node-versionIf the required version isn’t installed:
nodenv installor install the specific version manually.
Problem 9: Shell Configuration Didn’t Load
Sometimes the shell configuration wasn’t reloaded after installation.
Instead of reopening the terminal, run:
exec "$SHELL"or
source ~/.bashrcor
source ~/.zshrcdepending on your shell.
Then verify:
nodenv doctorif you have the diagnostic plugin installed.
Problem 10: Permissions Issues
Occasionally, permission errors prevent Node.js installation.
Example:
Permission deniedCheck ownership:
ls -la ~/.nodenvFix permissions if necessary:
chmod -R u+rw ~/.nodenvAvoid using sudo when installing Node.js versions with nodenv unless absolutely necessary.
Useful Commands for Troubleshooting nodenv
These commands can quickly identify common problems:
nodenv --versionDisplays the installed nodenv version.
nodenv versionsLists all installed Node.js versions.
nodenv versionShows the currently selected version.
which nodeDisplays the Node.js executable being used.
node -vVerifies the active Node.js version.
nodenv rehashRebuilds executable shims.
echo $PATHChecks whether nodenv directories are correctly configured.
Tips to Prevent Future nodenv Issues
Keeping your nodenv setup clean can help avoid recurring problems.
- Keep your shell configuration organized.
- Install only one Node.js version manager.
- Run
nodenv rehashafter installing global npm packages. - Restart your terminal after changing configuration files.
- Keep nodenv and node-build updated.
- Check your PATH if Node.js suddenly changes versions.
- Use project-specific
.node-versionfiles for consistency across teams.
Conclusion
Most nodenv issues can be resolved by checking your installation, verifying your PATH configuration, rebuilding shims with nodenv rehash, and ensuring the correct Node.js version is installed. Avoid conflicts with other version managers and keep nodenv updated for the best experience. With these troubleshooting steps, you can quickly restore a stable development environment and manage multiple Node.js versions confidently across different projects.