Managing multiple Node.js versions can become challenging when different projects require different environments. That’s where nodenv comes in. It is a lightweight and efficient version manager that allows you to install, switch, and manage multiple Node.js versions without affecting your system installation. Whether you’re a beginner learning JavaScript or a professional developer maintaining several applications, nodenv helps keep your workflow organized and consistent.
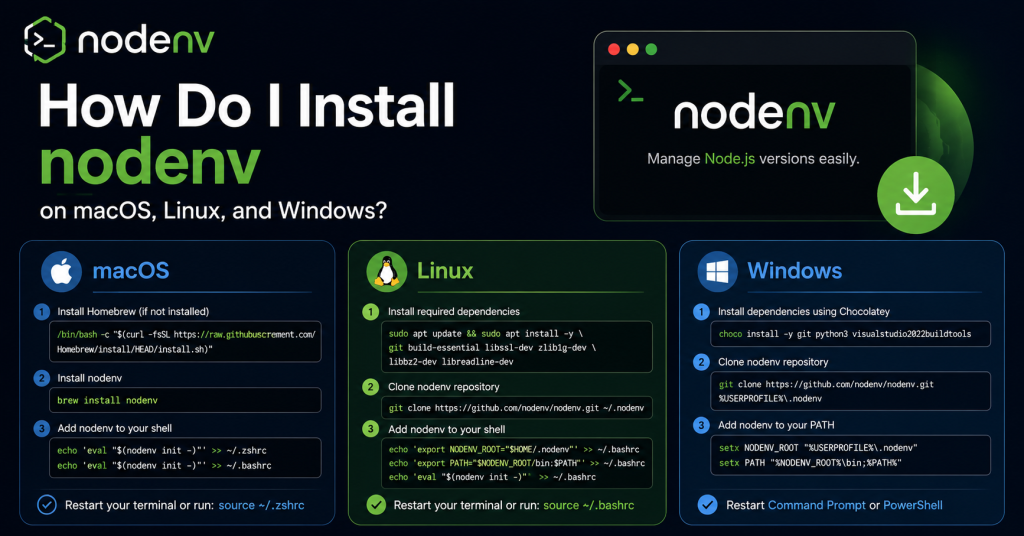
Installing nodenv is straightforward, although the process varies slightly depending on whether you’re using macOS, Linux, or Windows. In this guide, you’ll learn how to install nodenv on each operating system, configure it correctly, verify that it’s working, and prepare your development environment for seamless Node.js version management. By the end, you’ll be ready to use the right Node.js version for every project with ease.
Read More: What Is nodenv and What Is It Used For?
What Is nodenv?
nodenv is an open-source Node.js version manager inspired by rbenv. Instead of modifying your system’s Node.js installation, it allows you to install separate Node.js versions and switch between them using simple commands.
Unlike some other version managers, nodenv stays lightweight and follows a minimal design philosophy. It changes your Node.js version only when needed, making it reliable for development environments.
Why Install nodenv?
Before installing nodenv, it’s helpful to understand why many developers prefer it.
Some of its biggest advantages include:
- Manage multiple Node.js versions on one computer
- Set project-specific Node.js versions
- Avoid conflicts between applications
- Keep your system installation clean
- Easily switch between Node.js releases
- Works well with Git-based development workflows
If you regularly build JavaScript applications, nodenv can save significant time and prevent version-related issues.
How to Install nodenv on macOS
macOS users have the easiest installation process thanks to Homebrew.
Step 1: Install Homebrew
If Homebrew isn’t already installed, open Terminal and install it with:
/bin/bash -c "$(curl -fsSL https://raw.githubusercontent.com/Homebrew/install/HEAD/install.sh)"Verify the installation:
brew --versionStep 2: Install nodenv
Install nodenv using Homebrew:
brew install nodenvThis installs the main nodenv package.
Step 3: Install node-build
To download and compile Node.js versions, install the node-build plugin:
brew install node-buildWithout node-build, nodenv cannot install Node.js versions.
Step 4: Configure Your Shell
Depending on your shell, add the initialization command.
For Zsh:
echo 'eval "$(nodenv init - zsh)"' >> ~/.zshrcFor Bash:
echo 'eval "$(nodenv init - bash)"' >> ~/.bash_profileReload your shell:
source ~/.zshrcor
source ~/.bash_profileStep 5: Verify Installation
Run:
nodenv --versionYou should see something similar to:
nodenv 1.x.xYour installation is now complete.
How to Install nodenv on Linux
Most Linux distributions support nodenv installation through Git.
Step 1: Install Required Packages
For Ubuntu or Debian:
sudo apt update
sudo apt install git build-essential curl
For Fedora:
sudo dnf install git gcc make curlFor Arch Linux:
sudo pacman -S git base-devel curlStep 2: Clone nodenv
Download nodenv into your home directory:
git clone https://github.com/nodenv/nodenv.git ~/.nodenvStep 3: Configure Environment Variables
Open your shell configuration file.
For Bash:
nano ~/.bashrcAdd:
export PATH="$HOME/.nodenv/bin:$PATH"
eval "$(nodenv init -)"
For Zsh:
nano ~/.zshrcAdd the same lines.
Save the file and reload:
source ~/.bashrcor
source ~/.zshrcStep 4: Install node-build
Clone the plugin:
git clone https://github.com/nodenv/node-build.git ~/.nodenv/plugins/node-buildStep 5: Verify Installation
Check that nodenv works:
nodenv --versionIf the version number appears, nodenv is installed correctly.
How to Install nodenv on Windows
Windows does not officially support nodenv because it relies on Unix shell behavior. However, you still have several ways to use it.
Option 1: Install Using Windows Subsystem for Linux (Recommended)
The easiest and most reliable approach is using WSL.
Install WSL
Open PowerShell as Administrator:
wsl --installRestart your computer if prompted.
After installation, open Ubuntu from the Start menu.
Inside Ubuntu, follow the Linux installation steps described earlier.
This provides the closest experience to running nodenv on a native Linux machine.
Option 2: Use Git Bash
Some developers install nodenv inside Git Bash.
First install:
- Git for Windows
- Git Bash
Then clone nodenv exactly as you would on Linux:
git clone https://github.com/nodenv/nodenv.git ~/.nodenvAlthough this may work for basic usage, compatibility varies depending on your setup.
Option 3: Use Docker
If you only need nodenv inside development containers, Docker is another practical option.
Create a Linux container, install nodenv, and use it within your isolated environment.
This method works well for teams using containerized development.
Verify That nodenv Is Working
Regardless of your operating system, you can verify the installation using:
nodenv --versionNext, check available Node.js versions:
nodenv install --listIf you see a long list of available versions, everything is configured correctly.
Install Your First Node.js Version
Once nodenv is installed, installing Node.js is straightforward.
For example:
nodenv install 22.10.0Set it as your global version:
nodenv global 22.10.0Refresh shims:
nodenv rehashConfirm:
node -vExample output:
v22.10.0Common Installation Problems and Fixes
Even a simple installation can occasionally run into issues. Here are some common problems and solutions.
nodenv Command Not Found
This usually means your PATH is not configured correctly.
Reload your shell configuration:
source ~/.bashrcor
source ~/.zshrcAlso verify that:
echo $PATHincludes:
~/.nodenv/binnode-build Is Missing
If you receive an error such as:
nodenv: no such command 'install'You probably haven’t installed the node-build plugin.
Install it:
git clone https://github.com/nodenv/node-build.git ~/.nodenv/plugins/node-buildNode Version Doesn’t Change
Run:
nodenv rehashThen verify:
nodenv versionsAlso ensure you’ve selected the correct version:
nodenv global 22.10.0Permission Errors
Avoid installing nodenv using sudo unless absolutely necessary.
Installing it within your home directory usually resolves permission-related problems.
Best Practices After Installing nodenv
After setup, following a few best practices can make version management smoother:
- Keep nodenv updated regularly.
- Update the node-build plugin to access the latest Node.js releases.
- Use local Node.js versions for project-specific development.
- Commit the
.node-versionfile to your project repository. - Avoid mixing multiple Node.js version managers on the same system.
These practices help maintain a stable and predictable development environment.
Conclusion
Installing nodenv is a smart choice for developers who need a simple and reliable way to manage multiple Node.js versions. While the installation steps differ slightly across macOS, Linux, and Windows, the overall setup is straightforward and well worth the effort. Once configured, nodenv makes it easy to install new Node.js releases, switch between versions, and maintain project-specific environments without conflicts. This helps improve development consistency and reduces version-related issues. Whether you’re building personal projects or working in a team, nodenv provides a clean and efficient workflow, making Node.js version management easier and more organized across different operating systems.