Managing multiple Node.js versions is a common requirement for developers working on different projects. One application may rely on the latest Node.js release, while another requires an older version for compatibility with existing packages or frameworks. Constantly uninstalling and reinstalling Node.js is time-consuming and can easily lead to development issues. That’s where nodenv comes in. It is a lightweight version management tool that allows you to install, organize, and switch between multiple Node.js versions with ease.
Whether you’re building personal projects, maintaining legacy applications, or collaborating with a team, nodenv helps ensure every project uses the correct runtime. In this guide, you’ll learn how to use nodenv to manage multiple Node.js versions, switch between them seamlessly, and create a more efficient, consistent, and hassle-free development workflow.
Read More: How Do I Install nodenv on macOS, Linux, and Windows?
What Is nodenv?
nodenv is a lightweight Node.js version manager that lets you install and use multiple Node.js versions on a single computer. Instead of replacing your system-wide installation every time you need a different version, nodenv allows each project to use the version it requires.
Unlike some version managers that rely heavily on shell scripts, nodenv works by using shims, making it fast, clean, and easy to understand.
Why Use nodenv for Multiple Node.js Versions?
Many developers work on different applications simultaneously. Each application may depend on a specific Node.js release because of framework compatibility, package support, or production requirements.
Using nodenv provides several benefits:
- Install multiple Node.js versions side by side.
- Switch between versions instantly.
- Set a default version for your entire system.
- Assign unique Node.js versions to individual projects.
- Prevent compatibility issues across applications.
- Keep development environments organized.
This flexibility is especially useful for freelancers, agencies, and teams maintaining legacy and modern applications at the same time.
Install Multiple Node.js Versions
Before switching versions, you’ll need to install the Node.js releases you want.
If the node-build plugin is installed, you can install any available version with:
nodenv install 18.20.4Install another version:
nodenv install 20.15.1You can install as many versions as needed.
To see every installed version:
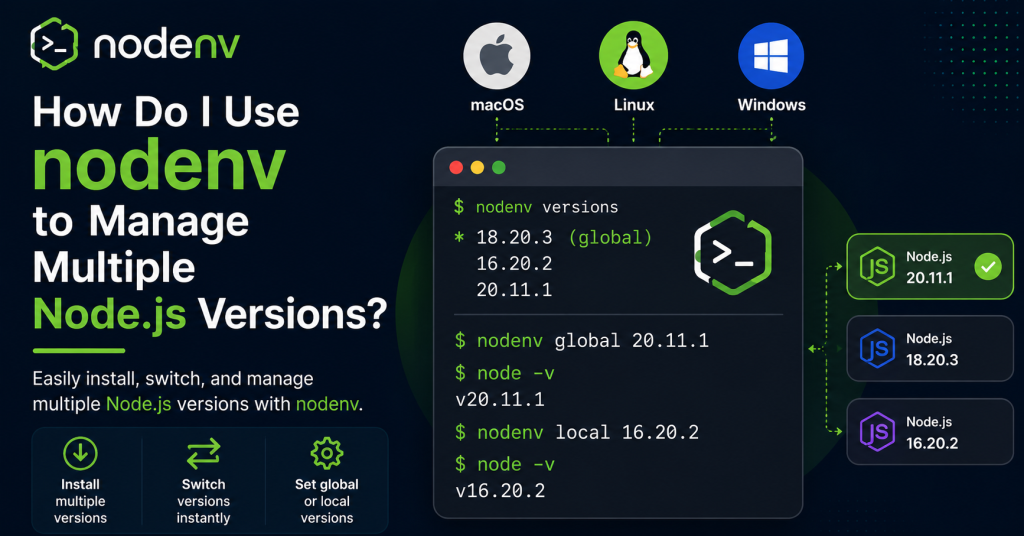
nodenv versionsExample output:
18.20.4
20.15.1
The currently active version is marked with an asterisk (*).
View Available Node.js Versions
If you’re unsure which versions are available, run:
nodenv install --listThis displays a list of downloadable Node.js releases, including:
- Latest stable versions
- Long-Term Support (LTS) releases
- Older supported versions
Choose the version that matches your project’s requirements.
Set a Global Node.js Version
The global version becomes the default Node.js version whenever you’re outside a project configured with its own version.
Set the global version like this:
nodenv global 20.15.1Verify it:
node -vOutput:
v20.15.1Now every terminal session uses this version unless another version is specified locally.
Set a Local Version for a Project
One of nodenv’s best features is assigning Node.js versions to individual projects.
Navigate to your project directory:
cd my-projectSet the local version:
nodenv local 18.20.4This creates a file named:
.node-versionIts contents look like:
18.20.4Whenever you enter that directory, nodenv automatically activates Node.js 18.20.4.
This ensures everyone working on the project uses the correct Node.js version.
Switch Between Installed Versions
Switching versions is simple.
For a system-wide change:
nodenv global 18.20.4For a single project:
nodenv local 20.15.1After changing versions, verify:
node -vNo uninstalling or reinstalling is required.
Use a Temporary Node.js Version
Sometimes you only need another version for a single command.
Use:
nodenv shell 18.20.4Now your current terminal session uses that version.
Open a new terminal or reset the shell to return to your previous configuration.
This is useful for testing applications without modifying project settings.
Check the Active Node.js Version
To see which version nodenv is currently using:
nodenv versionExample:
18.20.4 (set by /Users/user/project/.node-version)This also tells you where the version was selected—from a local project, the shell, or the global configuration.
Rebuild Shims After Installing Packages
Whenever new executables become available, update nodenv’s shims by running:
nodenv rehashThis ensures newly installed commands are recognized correctly.
Many developers run this after:
- Installing a new Node.js version
- Installing global npm packages
- Updating executables
Verify Everything Is Working
You can confirm your setup with:
node -v
npm -v
which node
nodenv version
These commands verify:
- Active Node.js version
- npm version
- Executable path
- Current nodenv configuration
If everything looks correct, your environment is properly configured.
Common Workflow Example
A typical workflow might look like this:
Install two Node.js versions:
nodenv install 18.20.4
nodenv install 20.15.1
Use Node.js 20 globally:
nodenv global 20.15.1Move into an older project:
cd legacy-appSet its local version:
nodenv local 18.20.4Check the active version:
node -vOutput:
v18.20.4Leave the project:
cd ..Run:
node -vOutput:
v20.15.1nodenv switches versions automatically based on your location.
Best Practices for Managing Multiple Node.js Versions
Following a few simple habits will help keep your development environment organized:
- Use the latest LTS release for production projects.
- Store the
.node-versionfile in version control. - Keep Node.js versions updated when appropriate.
- Remove outdated versions you no longer use.
- Run
nodenv rehashafter installing global packages. - Verify the active version before deploying applications.
These practices reduce configuration errors and improve consistency across development teams.
Troubleshooting Version Switching Issues
If nodenv isn’t switching versions correctly, check the following:
Confirm nodenv Is Installed
Run:
nodenv --versionIf this command fails, reinstall nodenv.
Verify PATH Configuration
Your shell configuration should initialize nodenv correctly. Reload your shell after making changes.
exec "$SHELL"Check the Active Version
Run:
nodenv versionThis tells you exactly which configuration is taking priority.
Rebuild Shims
If commands aren’t recognized:
nodenv rehashConfirm Installation
List installed versions:
nodenv versionsIf your desired version isn’t listed, install it first.
Conclusion
Using nodenv to manage multiple Node.js versions is a simple and effective way to keep your development environment organized. It allows you to install multiple Node.js releases, switch between them effortlessly, and assign specific versions to individual projects without affecting your system-wide setup. This helps prevent compatibility issues, improves workflow efficiency, and ensures consistent development across different applications and team members. Whether you’re maintaining legacy projects or building new ones with the latest Node.js features, nodenv provides a reliable solution for version management. By understanding how to use global, local, and temporary version settings, you can work confidently across multiple projects while keeping your Node.js environment clean, flexible, and easy to maintain.