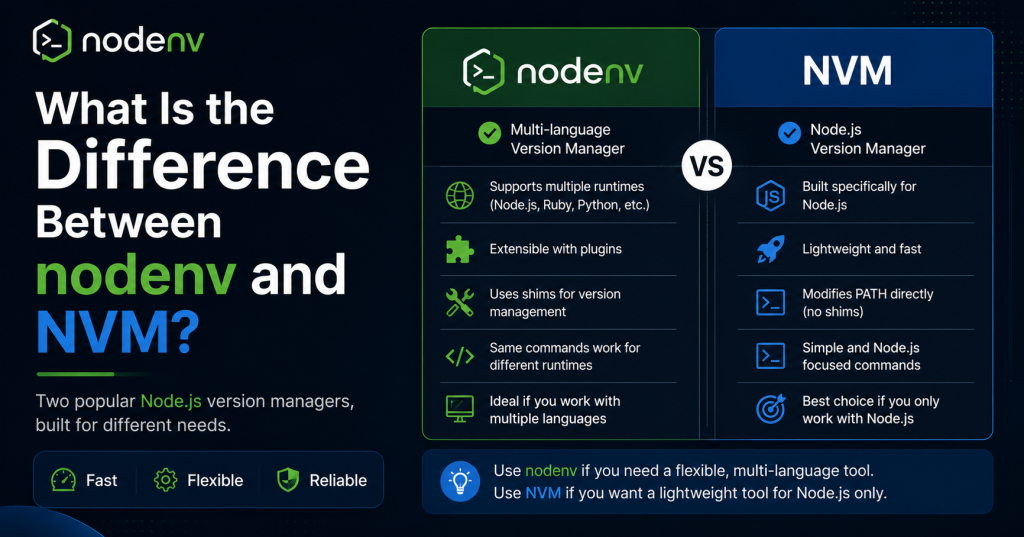
If you’re developing applications with Node.js, managing different Node.js versions is essential. This is where nodenv and NVM (Node Version Manager) come in. Both tools are designed to help developers install, manage, and switch between multiple Node.js versions on a single machine, making it easier to work on projects with different requirements. While they serve the same purpose, they use different methods to select and manage Node.js versions, which can affect your workflow and development experience.
Understanding the difference between nodenv and NVM can help you choose the version manager that best matches your needs. In this guide, we’ll compare their features, installation process, performance, ease of use, and ideal use cases so you can confidently decide which tool is right for your Node.js projects.
Read More: How Do I Use nodenv to Manage Multiple Node.js Versions?
Why Do You Need a Node.js Version Manager?
Many developers work on multiple projects at the same time. One project may require Node.js 18, while another depends on Node.js 20 or even an older version. Installing only one version of Node.js can create compatibility issues.
A version manager allows you to:
- Install multiple Node.js versions.
- Switch between versions easily.
- Set project-specific Node.js versions.
- Avoid conflicts between development projects.
- Test applications on different Node.js releases.
Both nodenv and NVM are designed to solve these problems, but they use different approaches.
What Is nodenv?
nodenv is a lightweight Node.js version manager inspired by rbenv, the popular Ruby version manager. Instead of changing your shell environment every time you switch versions, nodenv uses small executable files called shims to determine which Node.js version should run.
When you execute commands like node, npm, or npx, nodenv checks your current directory, your configured local or global version, and then runs the correct Node.js installation automatically.
Its simple design makes it fast, reliable, and easy to integrate into developer workflows.
What Is NVM?
NVM stands for Node Version Manager. It is one of the most popular tools for installing and managing multiple Node.js versions.
Unlike nodenv, NVM works by modifying your shell environment whenever you change Node.js versions. Commands such as nvm install, nvm use, and nvm alias make it easy to install and switch between different releases.
NVM is widely recommended for beginners because of its straightforward command-line interface and extensive documentation.
The Main Difference Between nodenv and NVM
The biggest difference is how each tool selects the active Node.js version.
nodenv uses shims placed in your system’s PATH. These shims automatically locate the correct Node.js version based on your configuration files.
NVM, on the other hand, changes environment variables in your current terminal session. Every time you switch versions, NVM updates the shell so that the selected version becomes active.
This architectural difference affects speed, usability, automation, and shell behavior.
Installation Process
Installing NVM is usually simple because it provides an installation script that automatically configures your shell.
nodenv installation generally involves installing nodenv itself, adding it to your PATH, and installing the node-build plugin to download Node.js versions.
While both installations are straightforward, NVM often feels easier for beginners, whereas nodenv gives experienced developers more control.
Switching Between Node.js Versions
With NVM, switching versions requires running a command such as:
nvm use 20The active version changes only for the current shell session unless configured otherwise.
With nodenv, you can define versions globally or locally. If a project contains a .node-version file, nodenv automatically uses that version whenever you enter the project directory.
This automatic behavior makes nodenv particularly convenient for developers working on many projects.
Project-Specific Version Management
One of nodenv’s biggest strengths is project-based version selection.
When you set a local version, nodenv creates a .node-version file inside the project directory. Every time you enter that folder, the correct Node.js version is selected automatically without requiring additional commands.
NVM can achieve similar behavior by using an .nvmrc file. However, users typically need to run a command like:
nvm useSome developers automate this process with shell plugins, but it is not automatic by default.
Performance Comparison
Both tools are lightweight, but nodenv often feels slightly faster because it doesn’t repeatedly modify the shell environment.
Since nodenv relies on shims, version detection happens seamlessly with minimal overhead.
NVM remains very responsive for everyday development, and most users won’t notice a significant performance difference unless they frequently open new terminal sessions.
Ease of Use
For beginners, NVM is generally easier to learn.
Its commands are descriptive and simple:
- Install a version.
- Use a version.
- List installed versions.
- Set default versions.
nodenv has fewer commands because much of its functionality works automatically. While this simplicity appeals to experienced developers, beginners may need some time to understand concepts like shims and rehashing.
Shell Compatibility
NVM is implemented as shell scripts, meaning it depends heavily on your shell configuration.
If your shell isn’t configured correctly, NVM commands may not be available in new terminal sessions.
nodenv behaves more like a standard executable installed on your system. Once configured properly, it generally works consistently across supported shells.
Windows Support
Officially, NVM was originally designed for macOS and Linux. Windows users typically use NVM for Windows, which is a separate project with similar functionality.
nodenv is mainly intended for Unix-like operating systems, including Linux and macOS. Running it on Windows usually requires environments such as WSL (Windows Subsystem for Linux).
For native Windows users, NVM for Windows is usually the more practical choice.
Plugin Ecosystem
nodenv supports plugins that extend its functionality.
The most commonly used plugin is node-build, which downloads and installs new Node.js versions.
NVM includes most essential features without requiring additional plugins, making it an all-in-one solution for many users.
Which Tool Is Better?
Neither tool is objectively better. The right choice depends on your needs.
Choose nodenv if you:
- Prefer automatic project version switching.
- Like minimal, lightweight tools.
- Use rbenv or pyenv and want a similar workflow.
- Want a clean development environment with minimal shell modifications.
Choose NVM if you:
- Are new to Node.js.
- Want the easiest installation process.
- Prefer explicit commands for switching versions.
- Need extensive community tutorials and documentation.
- Use Windows with NVM for Windows.
Feature Comparison
| Feature | nodenv | NVM |
|---|---|---|
| Version Switching | Automatic using shims | Manual with nvm use |
| Project Version Detection | Automatic | Uses .nvmrc with manual command |
| Shell Changes | Minimal | Updates shell environment |
| Ease for Beginners | Moderate | Excellent |
| Performance | Very lightweight | Lightweight |
| Plugin Support | Yes | Built-in features |
| Windows Support | Best with WSL | Native via NVM for Windows |
| Learning Curve | Slightly higher | Easier |
Advantages of nodenv
nodenv offers automatic project switching, minimal shell modifications, consistent behavior, and excellent integration with other *env tools like rbenv and pyenv. Its lightweight architecture appeals to developers who prefer clean and predictable environments.
Advantages of NVM
NVM provides a beginner-friendly interface, quick installation, comprehensive documentation, broad community support, and a rich set of built-in commands for installing, switching, and managing Node.js versions. It remains one of the most widely used Node.js version managers.
Can You Use Both Together?
Using nodenv and NVM simultaneously is generally not recommended.
Since both tools manage Node.js versions differently, installing both can create PATH conflicts and unpredictable behavior.
Most developers choose one version manager and use it consistently across all projects.
Conclusion
Both nodenv and NVM are excellent tools for managing multiple Node.js versions, and each has its own strengths. nodenv is ideal for developers who prefer a lightweight solution with automatic project-based version switching and minimal shell modifications. NVM, on the other hand, is known for its beginner-friendly commands, simple installation process, and large community support. The right choice depends on your development workflow, operating system, and personal preferences. If you’re looking for simplicity and extensive documentation, NVM is a great option. If you value automation and a clean, efficient environment, nodenv is worth considering. Regardless of which tool you choose, both make it easier to manage Node.js versions and improve your overall development experience.