Managing multiple Node.js versions is a common requirement for developers working on different projects. One application may depend on the latest Node.js release, while another requires an older version for compatibility with existing packages. Instead of uninstalling and reinstalling Node.js every time you switch projects, nodenv offers a simple and efficient solution. It allows you to install multiple Node.js versions on the same system and switch between them effortlessly using global, local, or temporary settings.
Whether you’re developing, testing, or maintaining applications, nodenv helps keep your workflow organized and prevents version conflicts. In this guide, you’ll learn how to switch between Node.js versions using nodenv, understand how version selection works, and discover the essential commands needed to manage your Node.js environments with confidence.
Read More: What Is the Difference Between nodenv and NVM?
Why Switch Between Node.js Versions?
Different applications often require different Node.js versions because of dependency compatibility. Upgrading Node.js for one project may break another that relies on older packages.
Using nodenv allows you to:
- Run multiple Node.js versions on the same computer.
- Keep project environments separate.
- Test applications on different Node.js releases.
- Avoid compatibility issues.
- Improve development workflow.
Instead of changing your entire system installation, nodenv lets you switch versions in seconds.
How nodenv Manages Node.js Versions
nodenv determines which Node.js version to use by checking settings in the following order:
- Local project version
- Global version
- System-installed Node.js
This priority ensures that every project can have its own Node.js version without affecting others.
View Installed Node.js Versions
Before switching versions, check which Node.js versions are available.
nodenv versionsExample output:
system
18.20.4
20.15.1
22.6.0
The version marked with an asterisk (*) is currently active.
Check Your Current Node.js Version
To see which version is currently being used:
node -vOr check through nodenv:
nodenv versionExample:
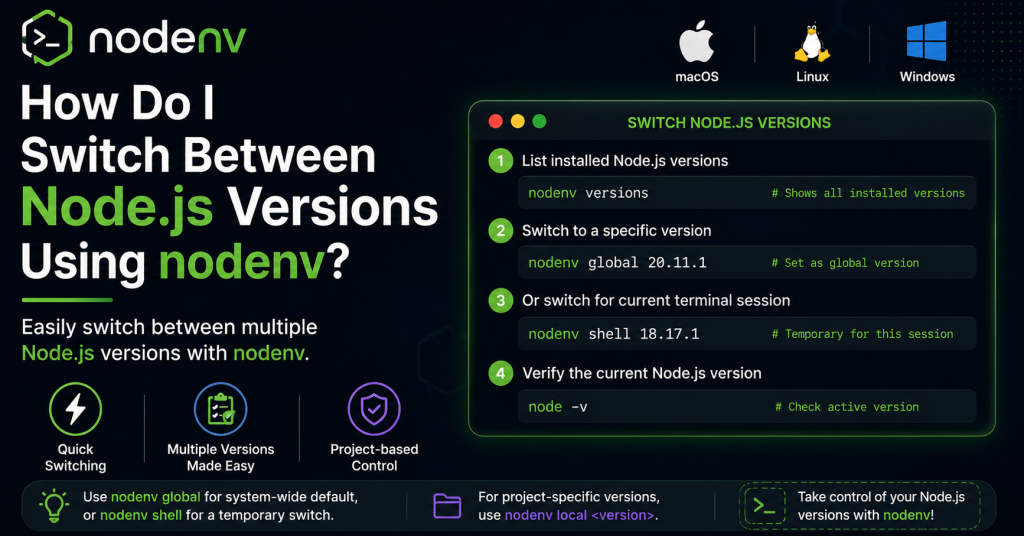
20.15.1 (set by ~/.nodenv/version)Switch Node.js Version Globally
A global version becomes the default Node.js version for your entire system unless a project overrides it.
Use:
nodenv global 20.15.1After switching, refresh shims:
nodenv rehashVerify:
node -vOutput:
v20.15.1Now every terminal session uses this version unless another version is specified locally.
Switch Node.js Version for a Specific Project
This is one of nodenv’s best features.
Navigate to your project:
cd my-projectSet the local version:
nodenv local 18.20.4This creates a file named:
.node-versionIts contents look like:
18.20.4Whenever you enter this project directory, nodenv automatically activates Node.js 18.20.4.
Leave the directory, and your global version becomes active again.
Use a Node.js Version Temporarily
Sometimes you only need a different version for one command.
You can use:
nodenv shell 22.6.0Now:
node -vReturns:
v22.6.0This temporary version only lasts for the current terminal session.
Close the terminal or unset it:
nodenv shell --unsetYour previous version becomes active again.
Verify Which Version Is Active
You can confirm the active version using:
nodenv versionExample:
18.20.4 (set by /home/user/project/.node-version)To check where Node.js is coming from:
which nodeor
nodenv which nodeThis helps verify that nodenv is controlling the Node.js executable.
Understanding Global vs Local Versions
Here’s the difference between the two settings.
| Global Version | Local Version |
|---|---|
| Applies everywhere | Applies only inside one project |
Stored in ~/.nodenv/version | Stored in .node-version |
| Default Node.js version | Overrides global version |
| Best for personal development | Best for project-specific requirements |
Most developers use a global version for everyday work and local versions for projects with specific requirements.
Install a New Node.js Version
If the version you need isn’t installed, first install it.
Example:
nodenv install 22.6.0After installation:
nodenv global 22.6.0or
nodenv local 22.6.0Refresh shims:
nodenv rehashAutomatically Switching Versions
One of nodenv’s biggest advantages is automatic version switching.
Suppose you have:
Project A
.node-version
18.20.4
and
Project B
.node-version
22.6.0
Moving between directories automatically changes the active Node.js version.
Example:
cd project-a
node -v
Output:
v18.20.4Now switch:
cd ../project-b
node -v
Output:
v22.6.0No manual switching is required.
Common Commands for Switching Versions
Here are the commands you’ll use most often.
Check installed versions:
nodenv versionsSet global version:
nodenv global 20.15.1Set local version:
nodenv local 18.20.4Temporary shell version:
nodenv shell 22.6.0View current version:
nodenv versionCheck Node.js version:
node -vRefresh shims:
nodenv rehashTroubleshooting Version Switching Problems
Sometimes nodenv doesn’t appear to switch versions correctly. Here are the most common causes.
Version Not Installed
Check available versions:
nodenv versionsInstall the missing version if necessary.
Forgot to Run Rehash
After installing Node.js:
nodenv rehashThis updates executable shims.
Shell Configuration Missing
Ensure your shell loads nodenv.
For Bash:
eval "$(nodenv init -)"For Zsh:
echo 'eval "$(nodenv init -)"' >> ~/.zshrcRestart your terminal afterward.
PATH Problems
Verify nodenv appears before your system Node.js installation.
Run:
which nodeIf it points to a system installation instead of nodenv, review your PATH configuration.
.node-version File Missing
If your project doesn’t switch automatically, confirm the directory contains:
.node-versionand that it specifies a valid installed version.
Best Practices for Managing Node.js Versions
To keep your development environment organized, consider these best practices:
- Use a global version for everyday development.
- Set a local version for every project.
- Commit the
.node-versionfile to version control. - Keep Node.js versions updated when possible.
- Remove outdated versions you no longer use.
- Run
nodenv rehashafter installing new Node.js versions. - Verify the active version before running builds or deployments.
Following these practices helps maintain consistency across development, testing, and production environments.
Conclusion
Switching between Node.js versions using nodenv is a straightforward and reliable way to manage different development environments. Whether you need a global version for everyday use, a project-specific version for compatibility, or a temporary version for testing, nodenv makes the process quick and hassle-free. Its automatic version switching through the .node-version file helps eliminate conflicts and ensures each project runs with the correct Node.js release. By understanding commands like nodenv global, nodenv local, and nodenv shell, you can streamline your workflow and improve productivity. With nodenv, managing multiple Node.js versions becomes simple, allowing you to focus on building and maintaining your applications instead of dealing with version compatibility issues.